Vitron 55" QLED - No Backlight, LED Driver Failure
Vitron 55-inch QLED with sound and picture but no backlight. LED driver boost converter failure diagnosed through voltage testing and capacitor replacement.
Symptoms
- Picture is visible with flashlight (flashlight test positive)
- Sound works normally
- No backlight - screen is very dark
- Menus and content visible but extremely dim
Diagnosis
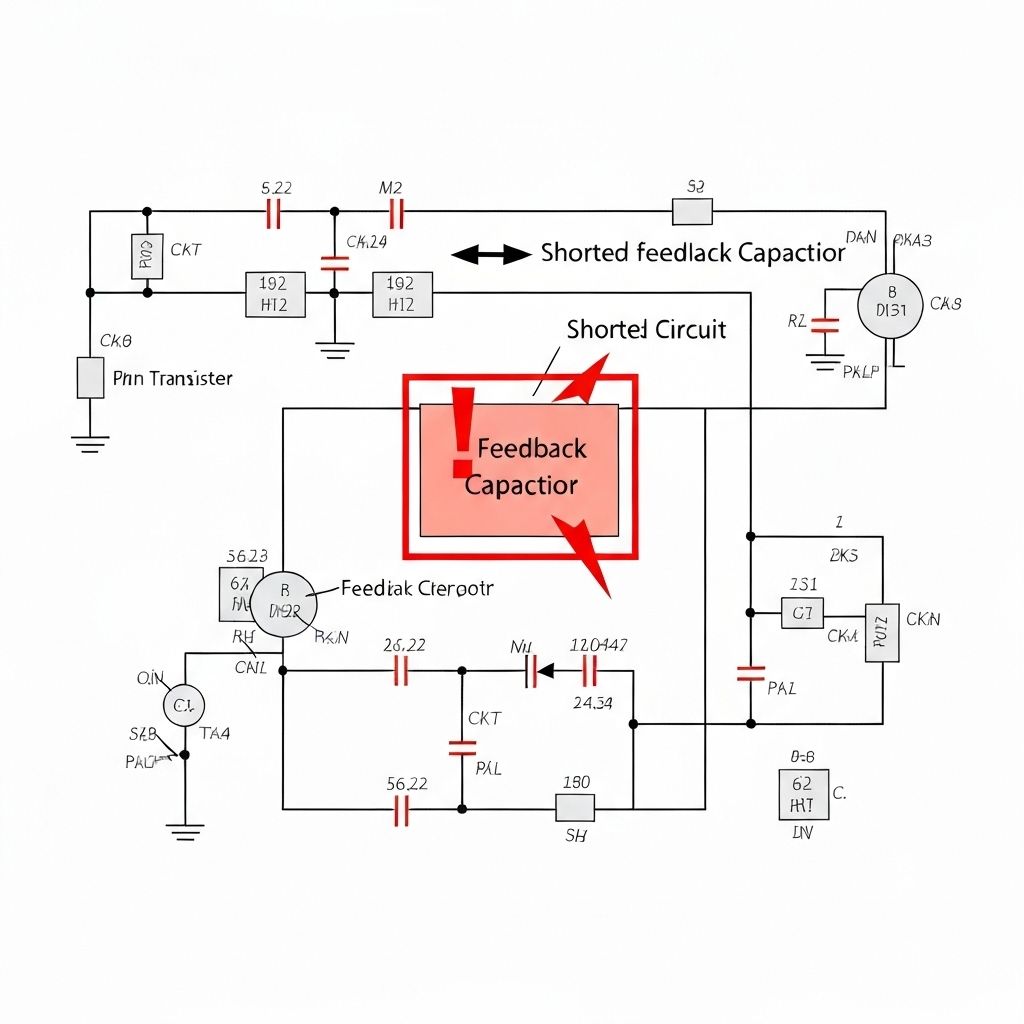
The 'flashlight test' confirmed the panel was generating an image - when shining a bright light at the screen, the picture was clearly visible. This ruled out main board or T-Con failure and pointed directly to the backlight system. Measured the LED driver output voltage and found 0V instead of the expected 60-80V. Input voltage to the LED driver IC was a stable 12V, so the driver circuit itself was the problem. LED drivers use a boost converter topology to step up 12V to the high voltage needed for LED strips. Traced the circuit and found a shorted ceramic capacitor (10µF 50V) in the feedback network of the boost converter. This short pulled the feedback voltage to ground, causing the controller to think the output voltage was zero and shut down the boost circuit for protection.
- Multimeter
- Hot Air Rework Station (for SMD work)
- Fine-tip Soldering Iron
- Tweezers (SMD)
- Magnifying Glass or Microscope
- Flux Pen
- Ceramic Capacitor (MLCC)10µF 50V X7R 1206Feedback capacitor - must be 50V+ rated
- Ceramic Capacitor (MLCC)22µF 100V X7R 1210Output filter (preventive replacement)
Repair Process
Confirm Backlight Failure
Perform the flashlight test - shine a bright flashlight at the screen while the TV is on. If you can see the image, the panel is working and the backlight is the problem. This is critical for diagnosis because it rules out expensive panel replacement.
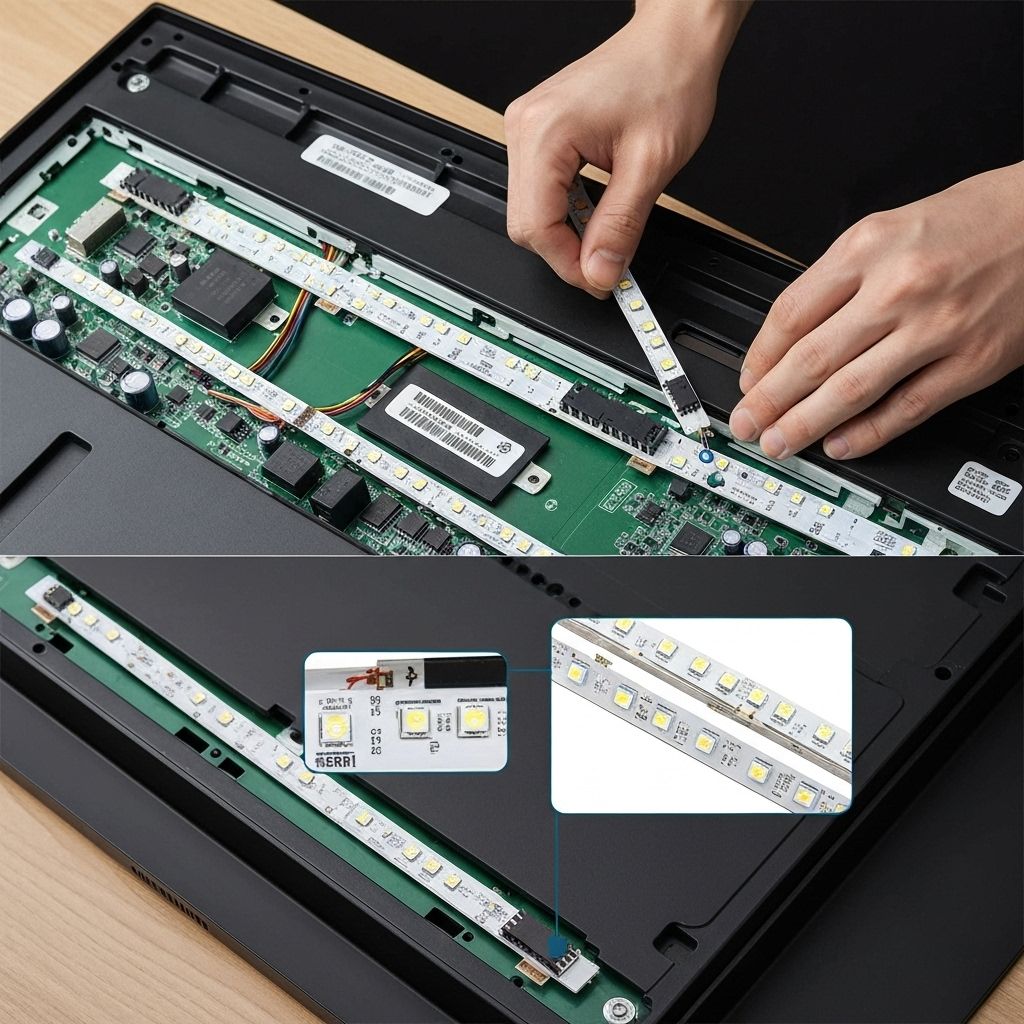
Test LED Driver Output
Remove the back cover and locate the LED driver section (usually part of the power supply board). With the TV on, carefully measure the voltage at the LED connector. BE CAREFUL - this can be 60-100V. If it reads 0V or very low voltage, the driver is not boosting. Measure the input voltage (should be 12V) to confirm the driver IC is getting power.

Locate the Shorted Component
Power off and unplug the TV. Use a multimeter in resistance mode to check the feedback capacitors near the LED driver IC. A good capacitor should show high resistance (megaohms). We found one reading 0.3Ω - a dead short. This is the culprit. Mark it for replacement.
Replace the Shorted Capacitor
This is SMD work requiring precision. Use hot air (350°C) or two soldering irons to remove the shorted capacitor. Clean the pads with flux and solder wick. Install the new 10µF 50V capacitor, ensuring it's rated for at least 50V (the original was under-rated at 35V, which is why it failed). Also replaced the output filter capacitor as preventive maintenance.

Test Backlight Operation
Reassemble and power on the TV. The backlight should illuminate immediately. Measure the LED driver output voltage - it should now read 60-80V depending on brightness setting. Test at different brightness levels to ensure the driver is regulating properly. The picture should be bright and clear.

Conclusion
A single $0.15 ceramic capacitor caused complete backlight failure. The root cause was an under-rated capacitor (35V) being used in a 60V+ circuit. Over time, the voltage stress caused it to short. Replacing it with a properly rated 50V capacitor ensures this won't happen again. This repair saved the customer from a $400+ panel replacement or buying a new TV. Total repair time: 45 minutes.