LG 48" OLED - Power Supply Capacitor Plague in Standby Circuit
LG OLED48C3PUA with intermittent power issues and random shutdowns. Standby circuit capacitor degradation diagnosed through ESR testing and replaced with premium components.

Symptoms
- TV powers on intermittently (works sometimes, fails other times)
- Random shutdowns during use (especially after 1-2 hours)
- Standby light flickers or dims
- Long delay before TV responds to power button
Diagnosis
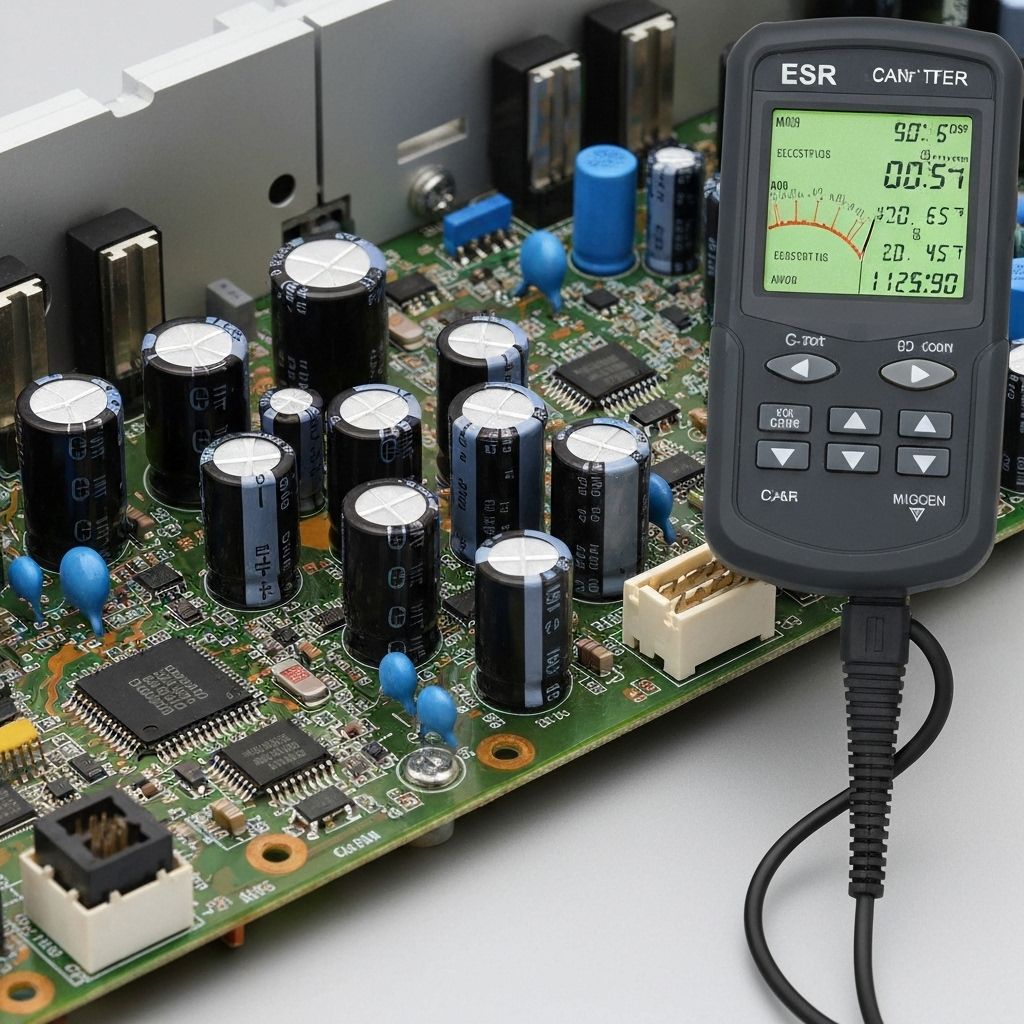
The standby circuit in modern TVs is always powered (even when 'off') to listen for remote control signals and maintain smart features. This 5V standby rail runs 24/7/365, putting continuous stress on its capacitors. Customer reported the TV had been getting progressively worse over 8 months. Initial testing showed the standby light was dim and flickering. Measured the 5V standby rail and found it fluctuating between 4.2V and 5.8V - way out of spec (should be 5.0V ±0.1V). Used an ESR meter to test all capacitors on the standby circuit. Found 4 capacitors with ESR readings above 8Ω (should be under 1Ω). Visual inspection showed no bulging, but high ESR indicates internal degradation. The root cause was cheap 85°C capacitors in a circuit that runs continuously and generates heat. After 3-4 years, the electrolyte dries out, ESR increases, and voltage regulation fails.
- ESR Meter (critical for this diagnosis)
- Multimeter
- Soldering Iron 60W
- Desoldering Pump
- Flux Pen
- Wire Cutters
- Electrolytic Capacitors470µF 10V 105°C Low ESRStandby rail filtering - need 4 pieces
- Electrolytic Capacitors220µF 16V 105°C Low ESRPreventive replacement - 2 pieces
Repair Process
Measure Standby Voltage
With the TV in standby mode (red light on), measure the 5V standby rail on the power supply board. Look for test points labeled 5VSB, 5VSTBY, or similar. The voltage should be rock solid at 5.0V ±0.1V. In this case, it was fluctuating wildly between 4.2V and 5.8V, confirming a regulation problem.

ESR Test All Standby Capacitors
Unplug the TV and locate the standby circuit section of the power supply (usually near the 5V regulator IC). Use an ESR meter to test each electrolytic capacitor IN-CIRCUIT. Good capacitors read under 1Ω. We found 4 capacitors reading 8-12Ω ESR - these are failing. Mark them with tape for replacement.
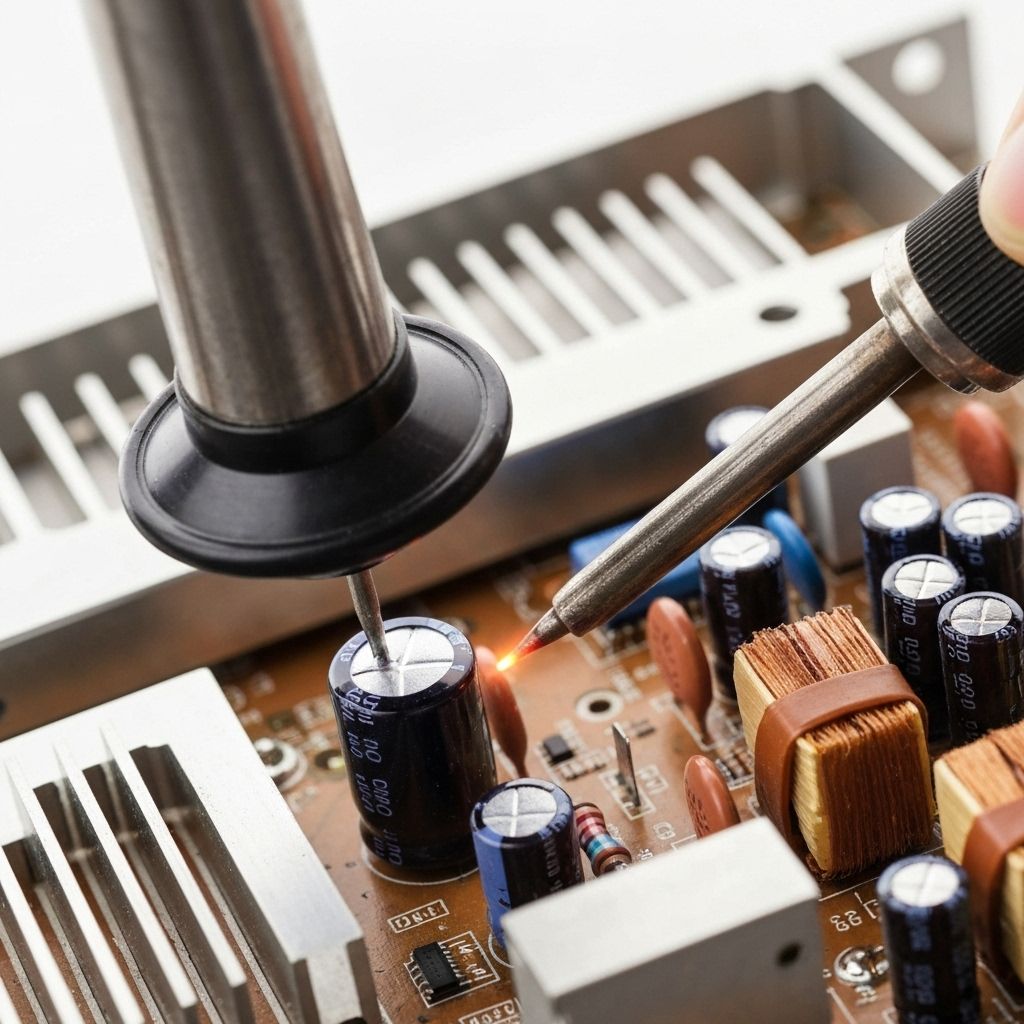
Remove Failed Capacitors
Desolder the high-ESR capacitors. Note the polarity carefully (stripe = negative). The standby circuit capacitors are usually smaller values (220µF, 470µF) at lower voltages (10V, 16V). Add fresh solder to help the old lead-free solder flow, then use a desoldering pump to clear the holes.
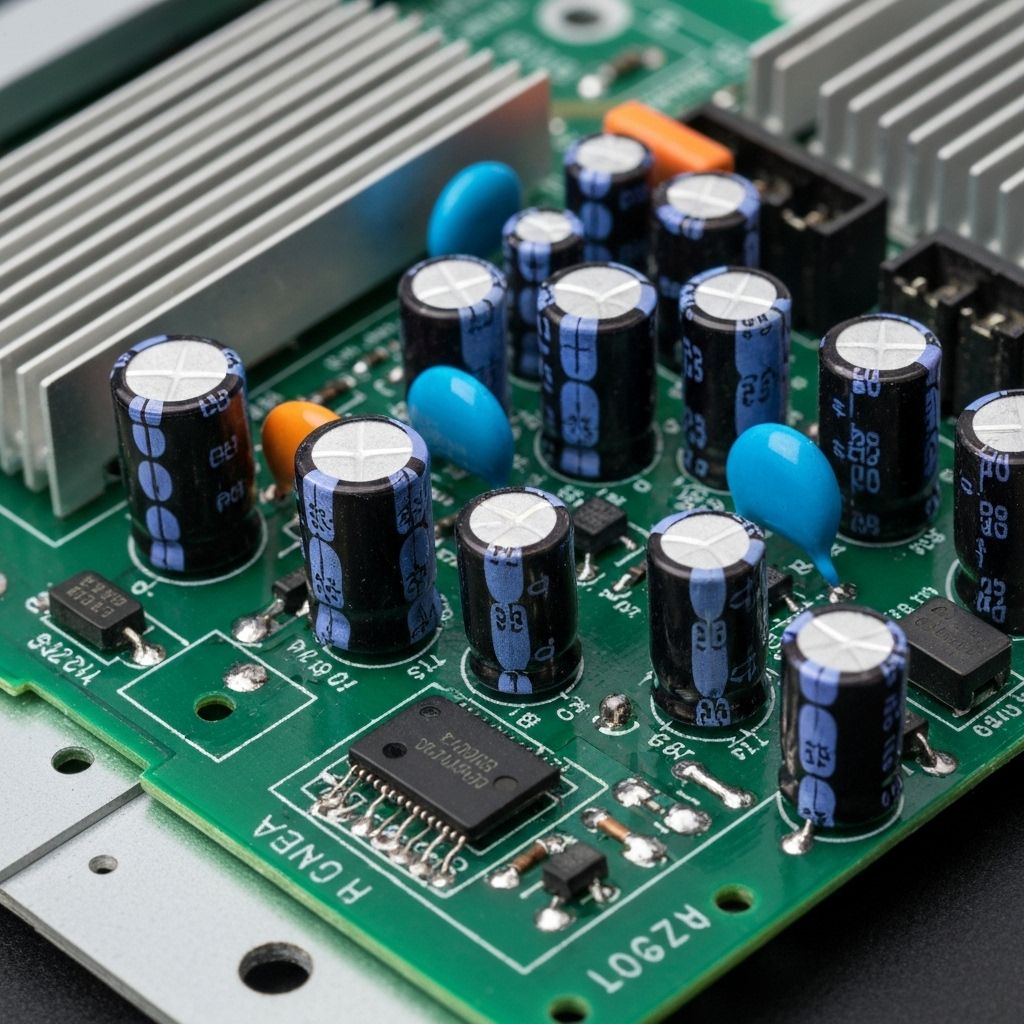
Install Premium 105°C Capacitors
Install new 105°C low-ESR capacitors. The 105°C rating is critical for the standby circuit because it runs continuously and generates heat. Use Nichicon, Panasonic, or Rubycon brands - avoid cheap Chinese capacitors. Verify polarity, solder in place, and trim leads.
Test and Verify
Plug in the TV and measure the 5V standby rail again. It should now be stable at 5.0V ±0.05V with no fluctuation. Test the TV power-on response - it should be immediate. Let the TV run for 2-3 hours to ensure no random shutdowns. The standby light should be bright and steady.
Conclusion
The standby circuit is the Achilles heel of modern TVs because it runs 24/7. Cheap capacitors in this circuit will fail after 3-5 years, causing intermittent power issues that are frustrating to diagnose. ESR testing is the key - visual inspection alone won't catch these failures. Total repair cost was under $10 in parts. This is a preventive maintenance repair that should be done on any TV over 3 years old. The 105°C capacitors will last 2-3x longer than the originals.